RAVE stars in Blender
Here we describe how to load RAVE stars into Blender and make a simple animation flying around the distribution using a circle as camera path. A similar procedure was also used to create the main part of the RAVE 3D fly-through movie at the RAVE webpage.
Requirements
- Blender 2.72 or newer (older version may work as well, but no guarantee)
Access to the RAVE database (or a dump of the stars you want). Here's an example file (< 10% of the DR4 stars) for testing: ravestars-demo.csv
Script:
- ravestars_mesh.py: loads RAVE stars and bins them by heliocentric radial velocity.
For the impatient, here's the final blend-file of this tutorial: ravestars-demo.blend.
And here's a video tutorial (no sound), which shows the Blender instructions given below in less than 5 minutes: ravestars-demo-tut.mp4, 30 MB
Loading RAVE stars in Blender
Download the script provided above.
Get all the RAVE stars with given
dist(i.e. not null), e.g. from the RAVE database with following SQL query:SELECT RAVE_OBS_ID, RAVEId, RAdeg, DEdeg, Glon, Glat, HRV, Teff_K, dist FROM RAVEPUB_DR4.RAVE_DR4 WHERE dist IS NOT NULL ORDER BY distDownload the result as CSV-format (comma-separated values). Any other format would in principle work as well, but you then need to adjust the read-function of the script for Blender.
Start Blender. Remove the default cube.
Adjust your window layout from Default to Scripting (at the top menu, next to
File,Renderetc.) or do it manually:- Split your default 3D window horizontally, switch the view of the lower window from 3D view to Timeline. This will be convenient for animations (but you can also skip this step). See Blender Manual - Arranging frames if you have troubles with this.
- Split the 3D window vertically, switch the context of the right frame to Text Editor.
Your window layout should now look similar to the following screenshot:
You don't have to adjust Blender this way, but it will make the following steps easier.
In the Text Editor's toolbar, choose
Text,Open Text Blockand select the downloaded script from above. Its content will be displayed in the text editor and you can make your own adjustments directly there.In the main-part towards the end of the script, adjust the
filenameto the csv-file containing the stars. Take care to choose the correct file pathdirnamefor your system as well.There are some more parameters you may want to adjust, like
posfac, the scaling factor for the star's positions in Blender units, or the size of each star (halosize).Choose
Text->Run Scriptor pressAlt+Pto run the script. Check the command line output (from where you called Blender) for error outputs. If everything went smoothly, you should see now the stars loaded from your file as dots in the 3D view. The script does not create one sphere-object per star (Blender could not handle that many objects so well), but instead creates for each star a vertex of a mesh-object. In fact, there are 5 mesh-objects created. They are listed in the Outliner view at the right side:stars-blue,stars-cyan,stars-orange,stars-redandstars-yellow. Each of them contains only the stars of a certain colour, which was determined based on the heliocentric radial velocity read from your csv-file. The mesh-objects' material types are set toHALO, in order to let each vertex appear as a small dot. The stars are put at their 3D positions in the galactic coordinate system. The default Blender plane thus corresponds to the plane of the Milky Way, the x-axis points along the 0° longitude line.
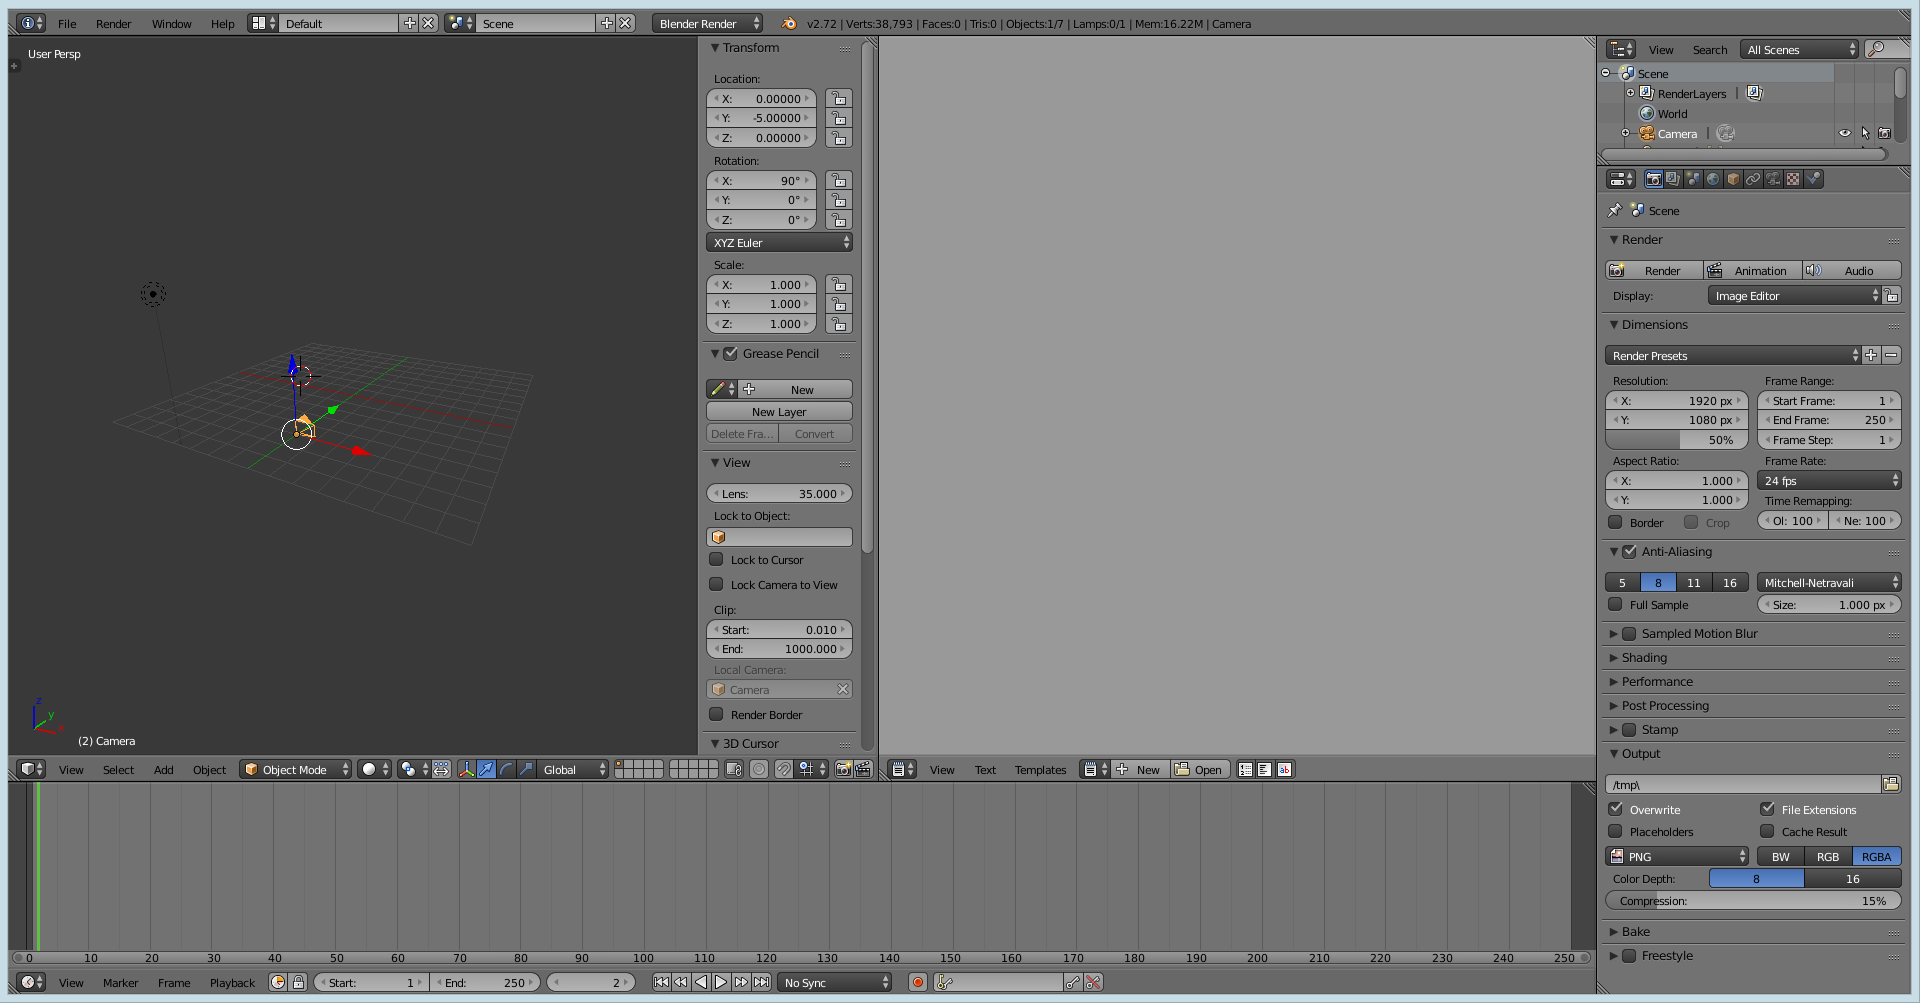
Select the default camera, set its
locationtoX=-4, Y=0, Z=0and itsrotationtoX=90, Y=0, Z=-90).Press
Numpad 0to switch to the camera view (or go toView->Camera).Press
F12to render your first image of the star distribution.
By adjusting your camera, you can get images from different views. Take care to stay close with your camera: if you move it too far away, the star-dots may become invisible. You can then increase the halo-size in the Material-properties of each star-mesh to make them visible again.
The default background is gray - if you like to change this, go to the World settings tab in the Properties view, and adjust the
Horizon Color, e.g. to a dark blue withR: 0, G: 0.006, B: 0.016.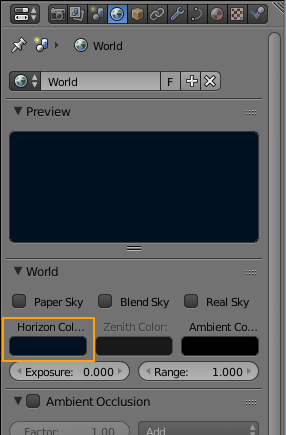
Animate camera path (fly around)
Select your camera, place it directly in the center and remove any rotation:
Alt+G,Alt+R.[EDIT] I've created now a script that takes care of the following steps for you, see animate_camera.py|GitHub. You can load this script and run it (
Text->Run Script) or follow the instructions below instead.In 3D view, choose
Add,Curve,Circleto add a circle. Place it at(0,0,0)and set itsSizeto10in each dimension. This circle will be used as camera path.Select your camera again, in the Properties view on the right select the Constraints-tab. At
Add Object ConstraintchooseFollow Path. SetTargetto the circle-curve. ClickAnimate Pathto add a first path animation.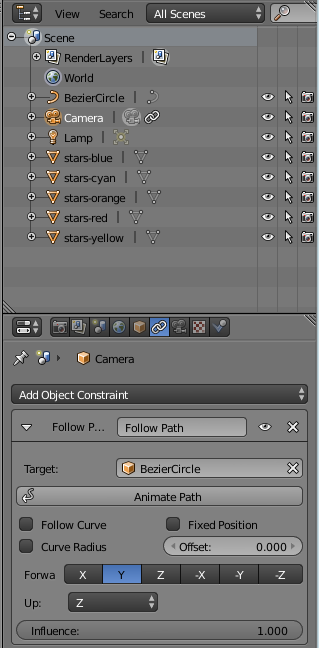
Move the green line in the Timeline view some frames forward and backward and watch how your camera moves along the circle-path.
The camera still looks down. We also don't want it to look just along x- or y-axis, but straight into the center of our star distribution at (0,0,0). We can achieve this by adding an object to the center which shall be tracked by the camera. So, in 3D view, e.g. go to
Add,Empty,Cubeand place it at (0,0,0). AnEmptyobject won't show up in the rendered images, so that's just fine for us.Select your camera again, and add another constraint:
Track To. SetTargetto yourEmpty, then adjust theTo-axis to-ZandUp-axis toY. Your camera should now look directly at your Empty-object. Switch to Camera View (Numpad 0).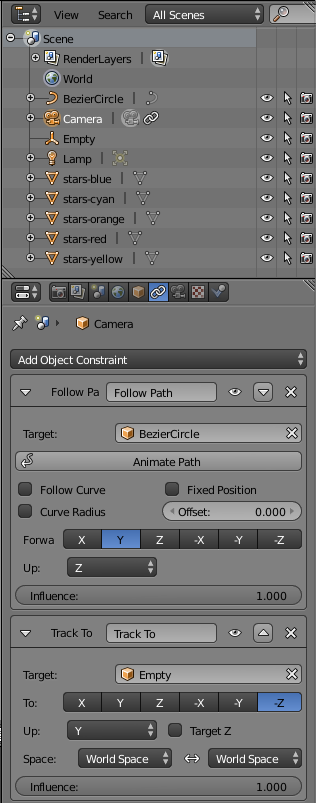
In the Timeline view, set the
Startframe to1,Endframe to100. Click on thePlaybutton (Alt+A) to start the animation preview. For a rendered movie, adjust theRender-settings in Properties to your desired output format, then click theAnimation-button (alternatively, chooseRender->Animation(Ctrl+F12) from the top menu).If you want the camera to move slower, you need to adjust the path animation. Set the current frame to
1in the Timeline. Select the circle-path, in Properties, tab to Data (Curve-symbol). Scroll down toPath Animation. Place your mouse cursor over the greenEvaluation Time, use theRight Mouse ButtontoClear Keyframes. This removes the automatically created path animation. TheEvaluation Timeshould be set to0. Insert a keyframe by placing your mouse cursor over theEvaluation Timeand pressing theIkey.Set the current frame to e.g.
200and the Evaluation Time to100. Insert another keyframe for the Evaluation Time (I). Play the animation again (Alt+A) and render the animation (Ctrl+F12) if you are happy with the speed. Check out the page Blender manual - Quick Render to get to know more about rendering.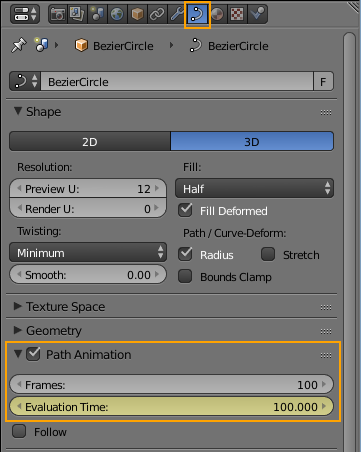
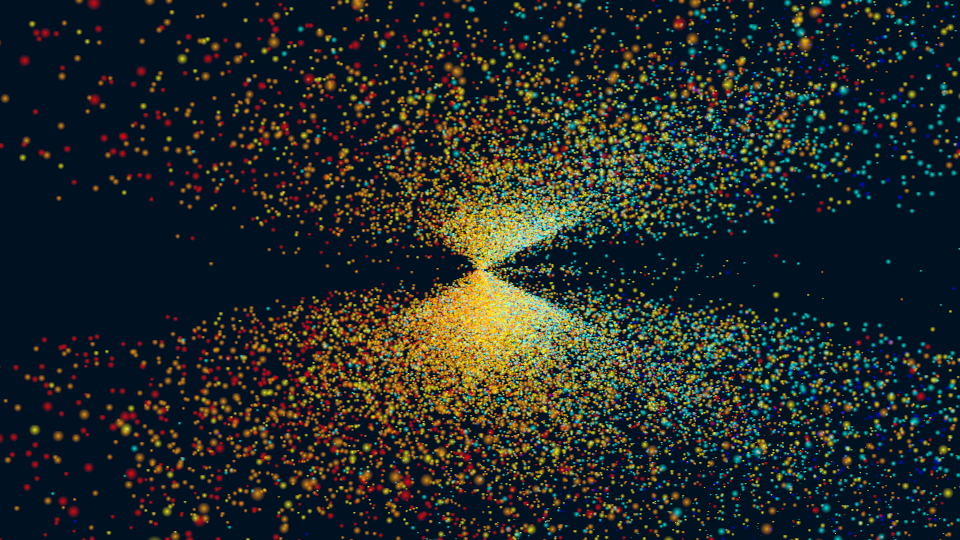
Here's the final animation using the example-blend-file with ~ 8% of the RAVE DR4 stars:
You can get a movie directly from Blender by changing the output format in the
Properties,Rendertab from png to a movie format (e.g.AVI JPEG). Or you glue the individual frames together usingmencoderfrom the command line,Windows Movie Makeror evenBlenderitself. Use low compression and high quality, otherwise your stars will appear too pixelized. See Movie from images for the mencoder-options we use for this kind of movie.